Adding IP Camera |
  
|
Adding IP Camera |
|
To add a new IP camera to the program, click the "Add Camera" on the toolbar:

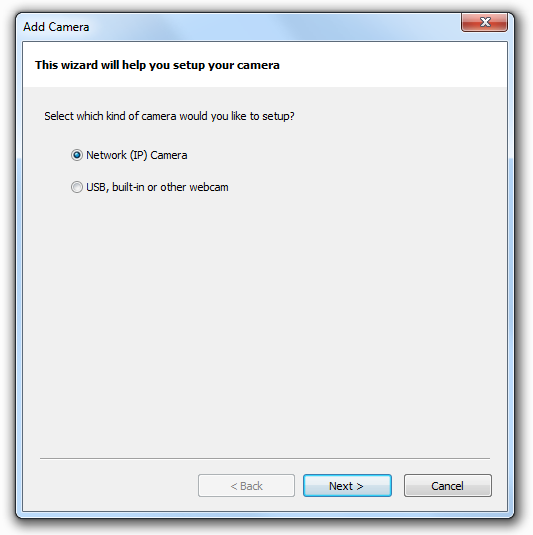
In new window choose the option "Network (IP) camera":
Click Next. If your camera is already working, click Next once again. Otherwise choose the second option to help you get your IP camera working.
The program will scan the local network and list all UPnP and ONVIF devices:
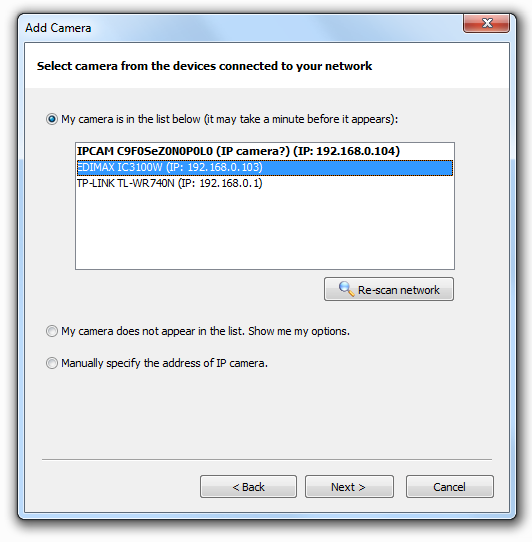
Choose your camera in the list and click "Next". Or you can choose the last option, click "Next", and specify IP camera settings manually:
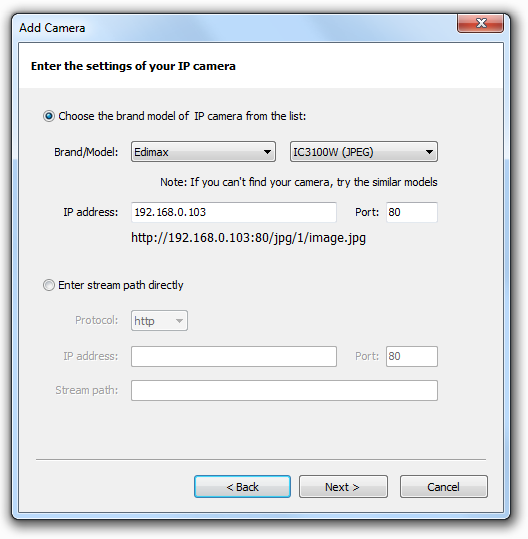
When done, click "Next". You will be sent to the new page:
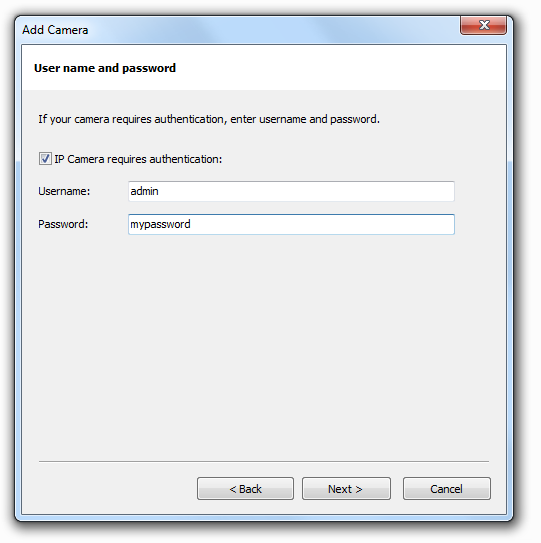
Here you should enter the username and password if your IP camera requires authentication. The default username and password can be found in the User Manual of your IP camera.
Click "Next".You can test a camera connection on the next page:
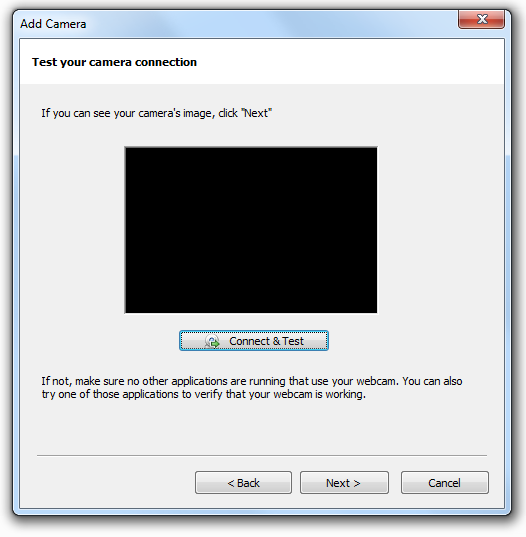
To do that, click at button "Connect & Test".

If you can see the video in preview area, then click Next. Otherwise, try to view your camera from your browser by clicking the corresponding link.
If you can see it in your browser, click the "Back" button, and check your user name and password.
On the next page, enter the name of your camera. A descriptive name (e.g. "Room"), can be helpful when using features where you need to tell your cameras apart.

Click Next.
Now you can configure your camera:
•Email and SMS notifications
•Schedule monitoring and recording