Setup
How to Connect IP Camera to PC
Connect cameras and a Windows recorder through Ethernet, Wi-Fi, a router, switch or direct link.
Read guide
Getting Started
A practical plan for using a Windows computer as the center of a small video surveillance system with IP cameras or webcams.
You do not necessarily need a dedicated network video recorder to build a useful small-camera system. A Windows PC can act as the monitoring and recording computer while IP cameras provide video over your local network. USB or built-in webcams can also be useful for rooms where the camera is physically close to the computer.
The important part is to design the system around the job it needs to do. Camera placement, reliable networking, sensible storage, and good motion-detection settings usually matter more than buying the highest-resolution camera available.
Before installing software, list the places where video would actually help. Think in terms of viewpoints rather than rooms. One camera might cover a front door and most of a hallway; another room might need two cameras because shelves or walls create blind spots.
If you are unsure about the number of cameras, see How Many Security Cameras Do You Need? before choosing a license or buying hardware.
The monitoring computer should be reliable enough to stay on for the periods when you expect recording or motion detection to run. A dedicated PC is usually easier to manage than a computer that is frequently restarted, put to sleep, carried away, or heavily loaded with unrelated work.
Security Eye 4.7 lists compatibility with Windows XP through Windows 11. For a system that will be connected to a network, however, it is generally better to use a Windows version that still receives security updates and to keep the operating system, browser, router, and camera firmware current.
IP cameras connect through Ethernet or Wi-Fi and can be placed independently of the computer. They are usually the better choice when cameras are spread around a home, office, shop, or other property. Webcams connect directly to the PC and can be simpler for a nearby indoor view.
For a multi-camera system, wired Ethernet is often easier to keep stable than Wi-Fi, especially for cameras that record continuously. Wi-Fi can still work well when signal strength is good and cabling is impractical.
Each IP camera needs a reliable network connection and an address that the Windows PC can reach. Configure the camera with the manufacturer's tool or web interface first, confirm that you can access it on the local network, and change any default credentials.
If the router supports it, reserving an IP address for each camera through DHCP can help prevent addresses from changing unexpectedly. Static addressing can work too, but avoid manually choosing an address that conflicts with the router's DHCP pool or another device.
Install Security Eye on the Windows PC, then add cameras one at a time. Testing each camera individually makes troubleshooting much easier than adding many devices before checking whether they stream correctly.
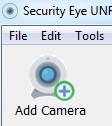
For an IP camera, Security Eye can scan the local network for UPnP and ONVIF devices. If the camera appears in the list, select it. If it does not, the wizard also provides a manual setup path. Enter the camera credentials when requested and use Connect & Test before completing the wizard.
Our detailed walkthrough, How to Add an IP Camera to Security Eye, covers this process step by step. The original function-by-function instructions are also available in the Security Eye User Guide.
A camera being visible in the application does not mean the system is finished. Decide what each camera should do:
Security Eye can record video after motion is detected and continue for a configurable period after the last detected movement. It can also take JPEG snapshots. Recorded video and images are stored in a folder selected on the Windows computer.
Do not set motion sensitivity once and assume it is correct. Walk through the monitored area, test slow and normal movement, and then leave the scene empty long enough to see whether lighting changes, reflections, trees, traffic, pets, or screens trigger unwanted events. The guide How to Reduce False Motion Detection Alerts explains how sensitivity and masking work together.
Video storage grows quickly. Required disk space depends on the number of cameras, resolution, frame rate, codec, scene complexity, bitrate, hours recorded per day, and how long you keep recordings. Motion-triggered recording can use much less space than continuous recording in a quiet scene, but the actual result depends on how often motion occurs.
Use a drive with enough free space for the retention period you need, and periodically verify that new files are still being written. If recordings are important, consider how they will be backed up or copied elsewhere. A local-only archive can be lost with the PC or drive; cloud-only storage has different bandwidth, cost, and privacy tradeoffs. See Local CCTV Recording vs Cloud Recording for a structured comparison.
Security Eye includes Web Access for viewing the program through a browser over the local network and, when configured, over the Internet. The application's manual states that Web Access is protected by a username and password, and those credentials can be configured on the Users tab.
If you enable any form of Internet access, do not leave default or empty passwords in place. Use strong unique credentials, keep the PC and router updated, expose only what is necessary, and prefer a secure remote-access design such as a properly maintained VPN when that is practical for your network. Remote camera access should be treated like access to any other sensitive system.
A good surveillance setup is not the one with the most features enabled. It is the one that consistently captures useful footage, avoids unnecessary alerts, keeps recordings for the period you need, and is simple enough that you will notice when something stops working.
Security Eye is video surveillance software for Windows with IP camera and webcam monitoring, recording, motion detection, scheduling, notifications, and remote web access.